In our home, summer vacation officially started last February when Dindin finished her PACEs. But it wasn’t only until late last month (March) that we thought of our perfect summer project–a Barbie dream house. The main color is pink and the motif is flowers and butterflies. It may not be Pinterest-worthy, but it sure did make my daughters happy. 😀
Doll house cost: Less than P500 and lots of love
Construction time: About 4 hours including painting. The embellishment time will vary.
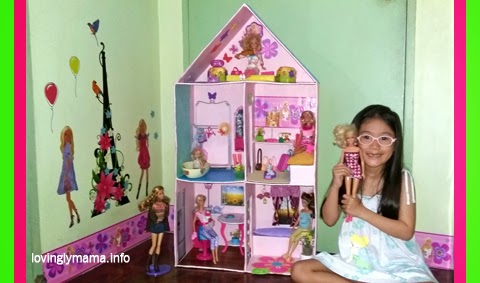
Dindin and her embellished DIY Barbie dream house.
Many of you know that Dindin has quite a collection of Barbie dolls, accessories, and furniture. But we don’t have a doll house. I went to the internet and looked for a doll house that I can order online and found one at Toys R Us USA. Although it was cheap there at only $35, it would cost double if I have somebody buy it for me and ship it over to the Philippines. That was when I got the idea of making one. Not only will we be able to customize it, it was something that Dindin and I can do together, hence the bonding.
I searched for the perfect used cardboard box but since it is already folded, it was hard to manipulate. My husband suggested that we buy an unused balikbayan box. And we got one at National Bookstore for a little less than P100. Thus was the foundation of our DIY Barbie Dream House.
Materials You Will Need:
1 Balikbayan Box
Cutter and scissors
Ruler
Cutting Mat
Pencil to mark the board
2 rolls of 2-inch Masking tape
1 roll of 1-inch Masking tape
Glue gun and stick
Elmer’s Glue
Paint
Doll accessories and furniture
Double-sided tapes, with foam and without foam
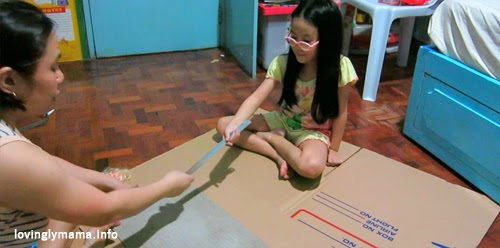
Dindin and I while we were starting to make the house. Sorry I don’t have any more photos of the making because it was on video and I don’t know how to capture them to make photos. :(
How to Make a Doll House
1. Open up the cardboard box. Cut the biggest portion, which is 20″ x 27″.
2. Measure and cut three pieces of cardboard box, 10″ x 27″ in length. These will be for the walls.
3. Measure and cut three pieces of cardboard box, 10″ x 20″ in length. These will be for the floors.
4. As for the roof, measure and cut two pieces of 10″ x 15″ cardboard box.
5. Get 1 piece of the 10″ x 27″ and 1 piece of the 10″ x 20″. Form it into a cross shape and tape together. Put this on top of the biggest portion and tape them all altogether. Do not be stingy with the tape. Tape from end to end on all sides.
6. Tape on the walls and floors. You should have the main body of the doll house by now.
7. Attach the roof by forming a triangle on top and taping them to the body.
8. Optional: Trace the shape of the roof on the remaining cardboard. Cut out the triangle and attach to the back as a wall to the attic. You may want to leave this part open though.
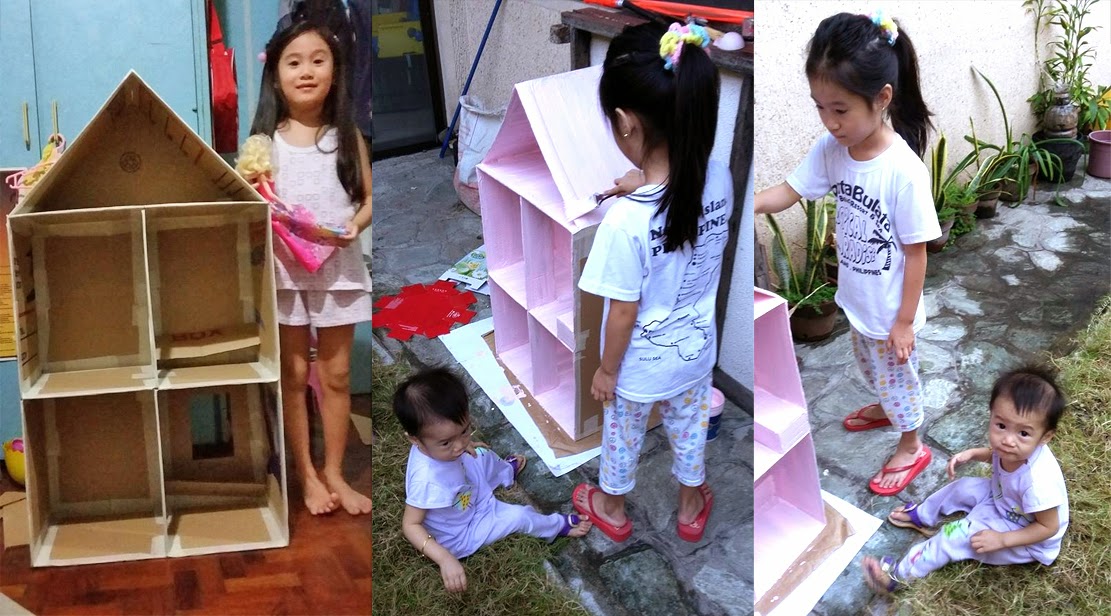
Left: That’s our assembled doll house.
Right: Dindin paints the exterior in the garden while Shane the toddler looks on (most of the time, at least).
9. Start painting. We used the Davies Elastomeric Odorless Paint so that we won’t have allergic reactions to the smell. We also did not need to air it out for days for the odor to dissipate before we can bring it inside our bedroom. They have baby pink available so we no longer needed tinting. We bought 1 quart because it was the smallest size, but we only used about half of it. You may also want to use poster paint, but I found it too expensive to cover the entire doll house. Latex was the cheapest option. I painted the inside part while Dindin did the exterior. Proud to say, Dindin did a better job than me. haha
10. Let it dry for at least six hours outdoors before bringing it inside your bedroom.
Embellish and Decorate Your Doll House
Now you are ready to embellish. So our house now looks like plain pink candy. We assigned parts of the house. For the lower part, we had the living room and kitchen. For the second level, we decided that it is where the bedroom and the bathroom are going to be. We had a problem with the attic because we couldn’t seem to decide what to do with it. Finally, it became Barbie’s music room. However, as of this writing, Dindin is still complaining that the music room needs more color. In short, it needs more accessories.
Just like in your own home, exercise your creativity in decorating your doll house. In our case, I constructed a built in bed and sofa for Barbie made of cardboard, so we painted it along with the house. However, I did make cushions for the sofa and the bed, as well as a pillow, to add more color. With each addition, Dindin would squeal, “Perfect Mom!”
Over the years, we have collected many accessories and furniture because of the many dolls that Dindin has. Some of them are not Barbie stuff. We also have those dolls that you can buy from China goods store. They have really nice accessories, like our little gold telephone. We have kept them all…or at least 95% of them. So we had a lot of choices in terms of what to add to the different rooms of our doll house. But we did buy the bath tub and the plastic flowers.
Here are photos:
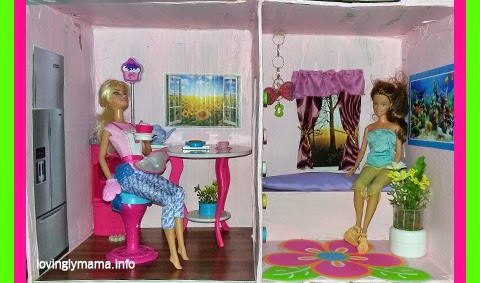
The first floor has the kitchen (left) and the living room (right). The kitchen floor is made of vinyl tiles that I bought at Ace Hardware for P18. It features a wood tile design.
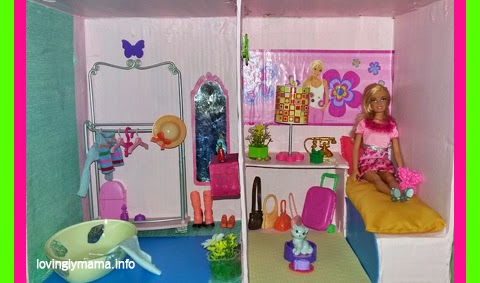
The second floor has the bathroom (left) and the bedroom (right).

This is the living room. Barbie has a nice view of the outdoors. The room has a curtain, a built in wall aquarium, some wall decors, potted flower arrangement, a flower carpet, and a hanging butterfly decor.

The dining area/kitchen has a dining table, a stove with oven, a tea pot, a cup and saucer, and some food stuff. This is a bake Barbie. I had stickers made for the refrigerator and the open window with sunflowers outside.
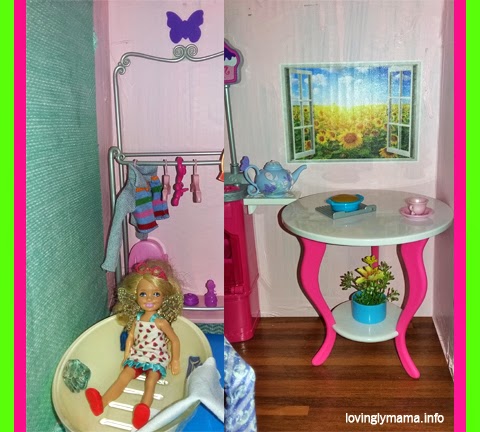
Left: The bath area. Notice the clothes’ rack with hangers at the back.
Right: The dining table with a potted plant at the bottom and an open window showing a sunflower patch.
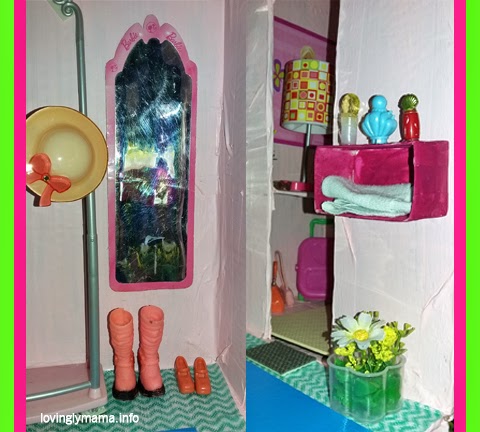
The bathroom has a dressing area with a wall mounted mirror, some shoes, a linen box with perfumes lining it on top. The bathroom floor is rag that I glued there.

This is Barbie’s bedroom. It has a wall clock, an eiffel tower wall decor, a bag collection under the dresser, a lamp shade, some flowers, a pair of sunglasses, a telephone, and a pet cat with her own bed and food. Notice the wall mural of Barbie. The carpet is the multi-purpose non-slip mat that I bought at Ace Hardware for P20 for 2 pieces. They come in different colors and textures.
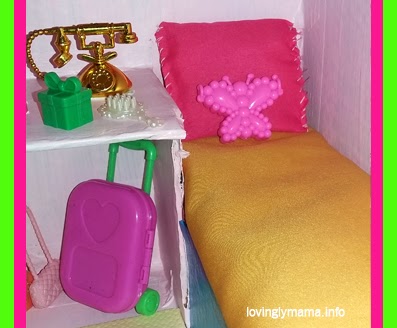
This is Barbie’s bed with gold bed cover and dark pink pillow cover. Notice the butterfly decor on the bed and the gift and hairbrush on the dresser. Some of Dindin’s finest touches.
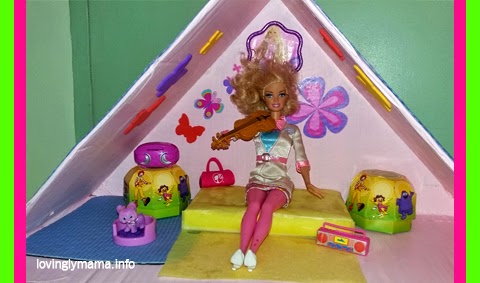
This is the attic. It was originally the yoga room but now it is the music room. Barbie has a violin and a couple of radios there. She also has a dog with a bed there. Flowers and butterflies also adorn the room and walls but Dindin is saying that it needs more color.
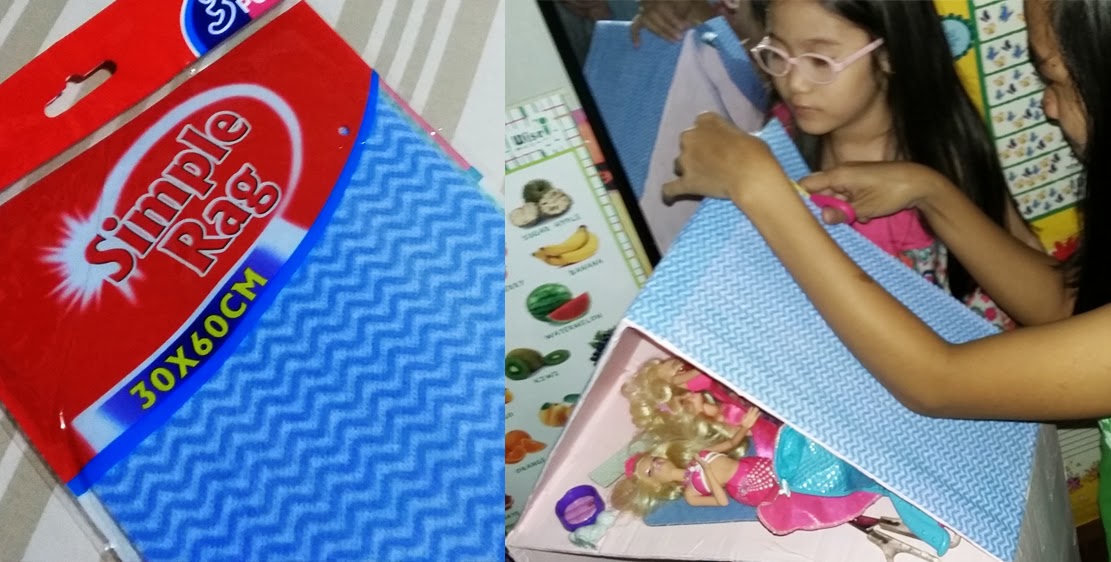
For the roof and the sides, I bought this simple rag that’s available at Robinsons Supermarket. I applied Elmer’s Glue on the surface and place this super absorbent yet colorful rag. Not only did it add color and design to the exterior of the doll house, it is sturdier, too. I also used some of this as carpet and wall paper.
A couple of friends of mine also made doll houses for their daughters using the balikbayan box. And I am sharing their photos here with permission. As you can see, you can choose the colors that you want and put in the accessories that you have. No need to buy extra stuff really. You can use whatever is available.

Left: Pia’s fashion house, made with her Mom Elena Gatanela.
Right: Ella’s shabby chic house with different doll sets, made with her mom. Dr. Maritel Ledesma. Thank you very much for sharing your pictures. :D
You may notice that our doll house is not very straight or is it very neat in the corners. That is fine. You will realize that your daughter wouldn’t mind the workmanship. For them, it is the fact that you made a doll house together and that her dolls have a home. Now, Dindin maintains her dollhouse by turning it every night to face the wall so that it will not gather dust. She also uses a static brush for the computer as a broom to clean up the place. I think it is a cool way to teach responsibility at the micro level. Another homeschooling activity.
Also, we made it while our toddler is almost always sprawled on the cardboard while we were cutting. But that was part of the fun. Even Dindin sat and laid on the cardboard from time to time. I guess for them it looked like an attractive mat for a lazy time. Just be careful with the cutter and scissors. Do not be so serious in making it. Always keep in mind that you are making it for your kids and not for yourself. So do not mind the intermissions and the occasional tornado that the toddler brings so you have to do some things all over again. Don’t lose your cool if you keep on getting interrupted while you are indulging your creativity. Our project took days to finish because we could not work on it for hours on end. Almost always something comes up. The important thing is, you are all working together and having fun. If you are a working mom though, working time may take longer because you only get to work on weekends. Unless of course, you will take a leave and use it to build this project. 😀
Almost to the end of our project, Dindin told me, “You are my Super Mom. You made me a beautiful doll house and I love it!” So this doll house is worth it. Have fun making yours! 😀